Category Archives: How To

How to oven form acrylic at home.

Or atleast how I oven formed acrylic. A few weeks ago I sent out a file (acrylic flatware) to Ponoko to be laser cut. I call them Sarsaparilla, named fora quote by the cowboy in the Big Liebowski who lends his face to the flatware.
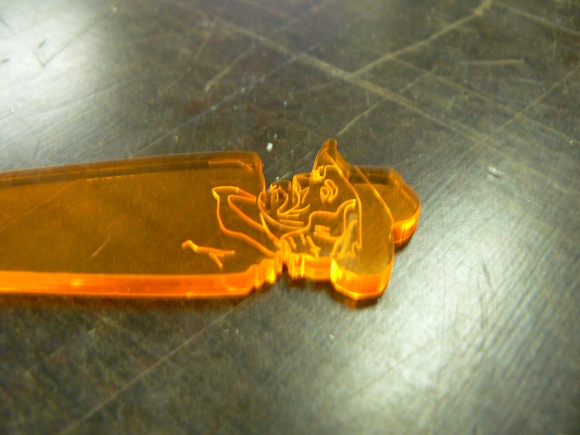
Sarsaparilla Close-Up

This is a little how to on oven forming acrylic from my experience (it’s very easy).

What you need:
Acrylic
Oven
Baking Sheet
Aluminum Foil
Timer
Felt – for handling the acrylic and to prevent scratches
Tools for forming

Tools for forming may include:
a Mold – any object/shape you can press the acrylic into to give it shape
mallet and/or a peen for shaping

Caution, I’ve only tried this in an Electric Oven. I can’t recommend for gas ovens.

I’m forming the flatware and using 2 forks and 2 spoons I already have to shape my acrylic fork and spoon.

Step 1, Preheat oven to 300 degrees.

Step 2, Make sure you unwrap the acrylic from the protective film.

Step 3, When oven is at 300, place the plastic on a piece of aluminum foil on the baking sheet. Set timer.

Time varies depending on thickness of the plastic. I heard 15 minutes for each 1/4″ thickness was the rule of thumb. My particular acrylic is 3mm (.12″ or 3/25″), I put it in for 5 minutes – worked great for my thickness.

Step 4, Remove from oven. The acrylic should be fairly malleable and will begin to cool rapidly.

Don’t touch without the felt. If you’re working larger, you will probably want leather safety gloves. The acrylic at this stage will take on any shape, including your finger prints.

The acrylic might stick to the foil. Gently rub it with any smooth object and it will pop right off.

Step 5, Immediately begin to form. Place plastic on felt and begin to push into the mold/form.

Press acrylic into place for about a minute, until the plastic is no longer moving. You’re done.
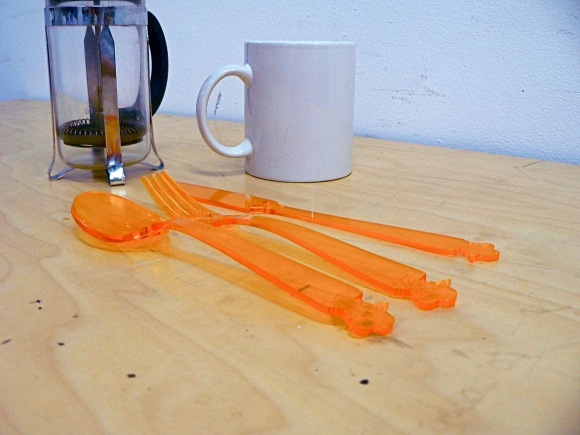
Sarsaparilla context

I made a video of the how to. I hope it helps. Or instructables.
Tagged , , ,

Hacking a broken Ipod into a HPDA case, secret spy compartment, cig case or wallet.

So I decided not to go with the tea cup lights or the mug branch after all. They’re still on my list of things to do and hopefully will eventually get around to it. But I remembered my dearly departed Ipod I single handedly rendered useless over a year ago.

I ended up hacking it into a case for my HPDA and posted it on instructables here. Or look down below…

Early one morning I was at work in a small center city coffee shop, brewing a large tub of ice tea. For some reason it seemed like a great idea to have my Ipod in my hand while I was trying to move the tub. You can guess what happened next.

The details are a little hazy, but the Ipod ended up in the boiling hot tub of tea. Although it can’t play any longer I kept it for a year before disassembling it in the hopes that one day it would work again.

When I finally did crack open the Ipod I guess I thought I would suddenly know the secrets of Mac and expertly fix my ipod (I don’t know why, because I’m technology illiterate). So its sat dormant in my dresser drawer waiting for the day it will once again have a purpose. Now he has found one… as a case for my HPDA. Your broken Ipod can now have a second life too as a case for an HPDA, cigarettes, wallet… whatever you can fit in it really. I was partly inspired by this cigarette case by TulipSociety’s Tara.

The finished HPDA case.

The finished HPDA case.


To do this you really shouldn’t need any extra materials. Whatever you have should be fine.

What you will need:

adhesive that will bond to metal (epoxy, zap-a-gap, superglue)

hinge and clasp (fabric, ribbon, paper, actual tiny hinges and clasps?)

something to pry the ipod apart with (I used a tack.)

tiny screwdrivers for impossibly tiny screws (or the tip of a dull Exacto blade

*optional*

black paint

Step One. Hacking into the Ipod

You’ll need something thin and sharp enough to get between the Ipod halves and thick enough to loosen them. I used a tack at the bottom of the Ipod. Once it was split I ran it up the sides of the Ipod until there was a space large enough to pry with my fingers or a screwdriver or whatever you have laying next to you.

Once you get it open, enjoy adventuring through a tiny little world of technology.

Step Two. Taking it all apart.

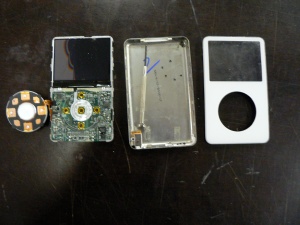
Ipod Guts

A lot of the pieces can removed manually but some require the tiny screwdriver or dull exacto blade. (Note. If using a blade to unscrew the screws, be very careful you don’t slip up!!!) You can cut the ribbons with a blade or scissors.

You’ll notice on the lid rim there are tabs to keep the Ipod in place. If you leave all of them you’ll constantly have to hack into the Ipod case again. I chose to gut the Ipod of all it’s insides and tabs. Removing ALL the tabs may have been a mistake, I think it’s too loose now. You can choose how you want it.

After everything I didn’t want was removed I glued the circular buttons back in the center with 5 minute epoxy.

Step Three. Hinges and Clasp


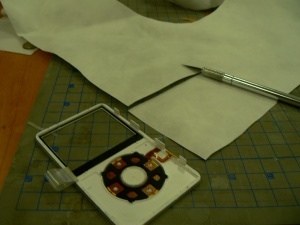
Cutting Tyvek for a Hinge

Cutting Tyvek for a Hinge

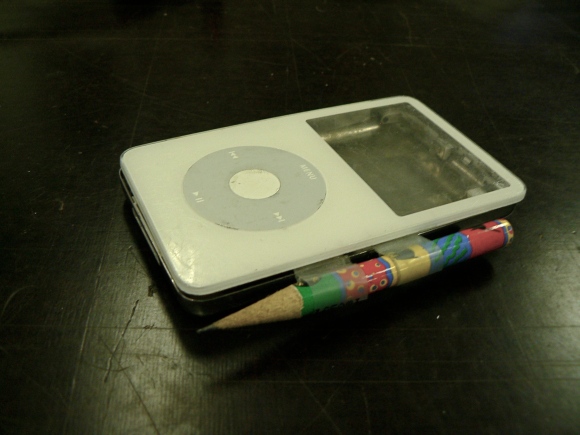
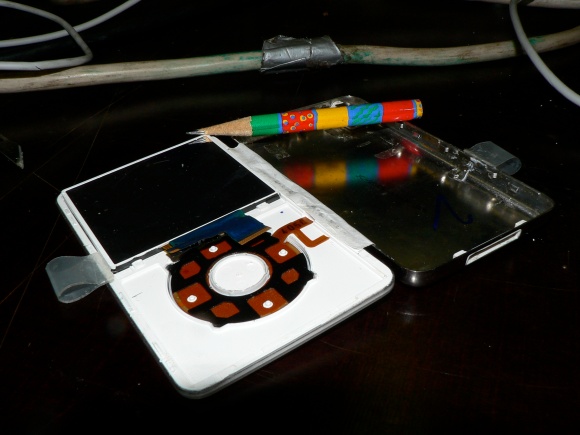
Glue the fabric, paper, plastic, whatever you have to use as the hinge, in place. There are all sorts of options for the clasp. I used some plastic from inside the case to make a pencil locked clasp. You could do something similar or employ a different technique. You can used ribbon to wrap around the case or two ribbons and tie them, what ever you want.


Step Four. Customizing.

Once the glue holding the hinges and clasp are dry, you’re done.

I chose to leave the screen clear but you can paint it black, add a photo, glue in a mirror or your business card, etc.

Finished CaseFinished Case Open

Tagged , , ,